If you’re an e-commerce business owner, adding products to your Shopify store can feel like a big task, but it doesn’t have to be! In this guide, we will walk you through the process step by step, making Shopify product addition as simple as possible.
Why Shopify?
Shopify is one of the most popular e-commerce platforms, with over 4 million businesses using it worldwide. It’s known for its easy setup, flexibility, and powerful tools for selling products. Whether you're selling clothing, gadgets, or services, Shopify has everything you need to get started.
Remember: A well-organized product page can improve your sales by 30% or more, so it’s important to get it right from the start.
How to Shopify Product Addition Made Easy
Step 1: Login and Access Your Dashboard
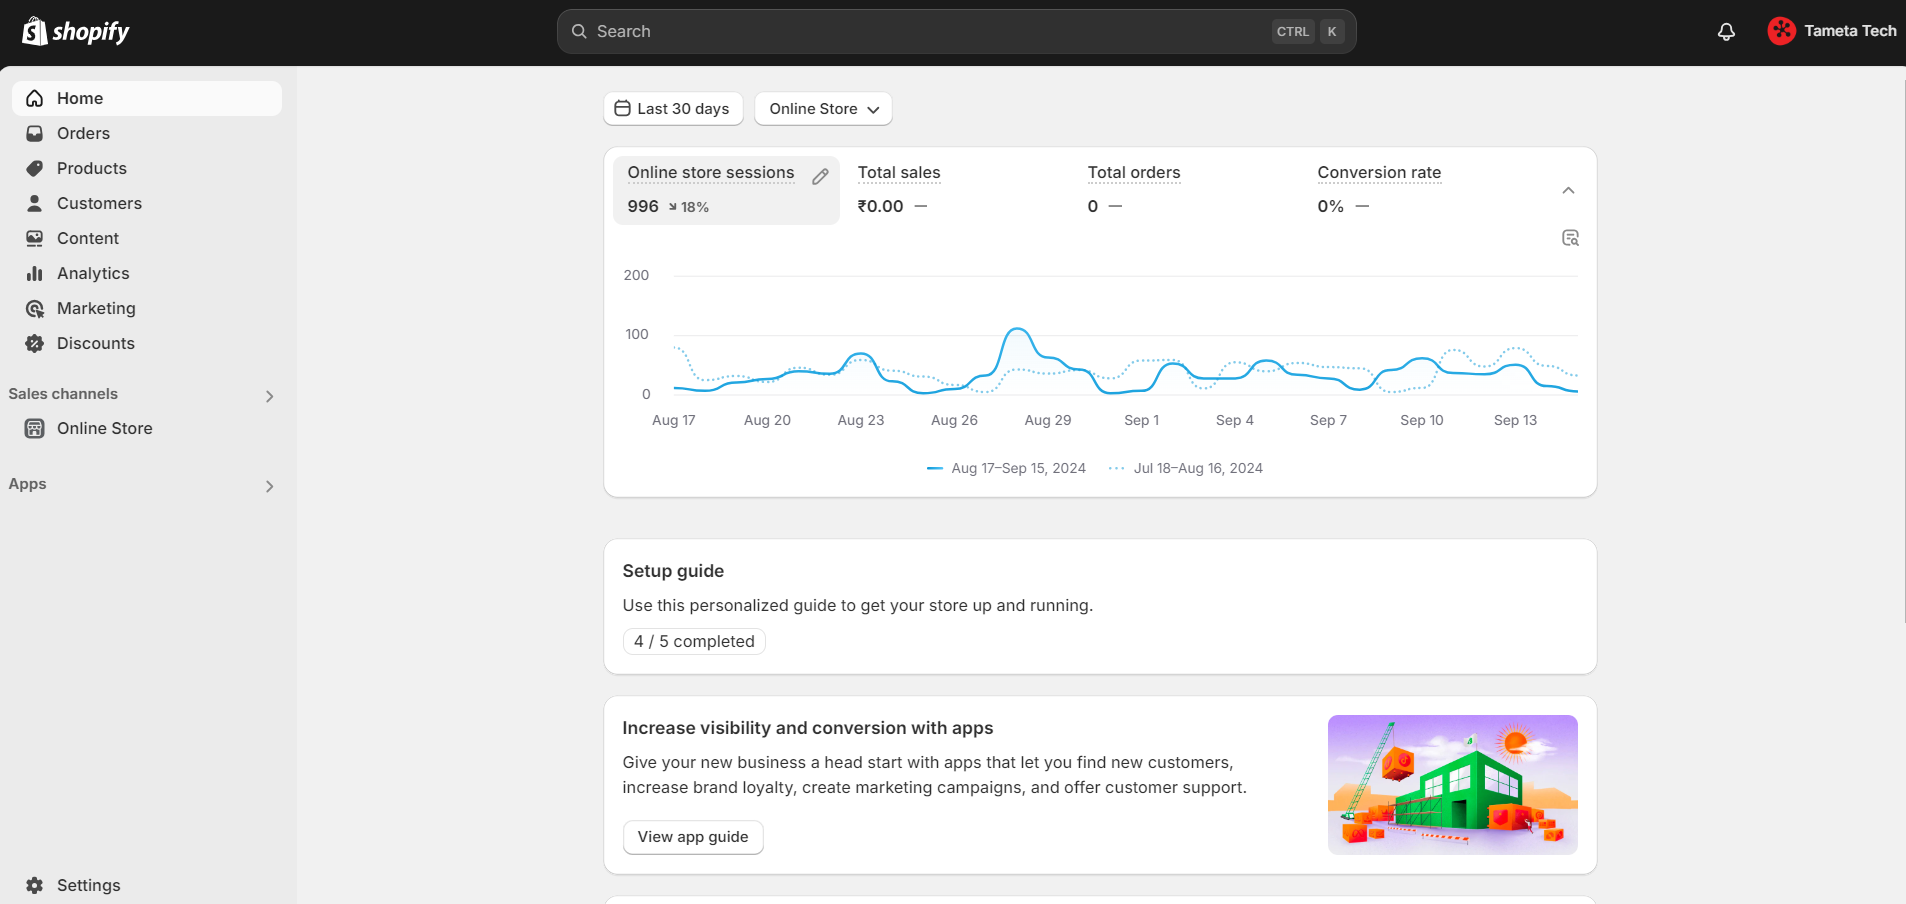
The first step in Shopify product addition is logging into your Shopify account. Once logged in, you’ll be taken to your Dashboard.

Tip: Bookmark your Shopify dashboard for easy access every time you need to manage your store.
In the dashboard, you'll see a button labelled “Products” on the left-hand side. This is where you’ll add, manage, and edit all your products.
Step 2: Click ‘Add Product’
Once you’ve clicked the “Products” section, you’ll see an “Add product” button. This is where the magic happens! When you click this button, Shopify will open a new page where you can add all the details about your product.

“Success is the sum of small efforts, repeated day in and day out.” – Robert Collier
Adding products one by one may seem slow, but consistency is key to building a successful Shopify store.
Step 3: Enter Product Details
The product details page is where you’ll fill in all the important information. Here’s what to include:
- Title: A clear and simple title for your product.
- Description: Write a brief description that explains what your product is and why customers should buy it.
- Images: Add high-quality images to show off your product. Remember, customers can’t physically touch your product, so images are essential for making sales.
- Price: Set your price and ensure it reflects the value of your product.
- Inventory: Manage your stock by entering how many of each item you have available.
According to Shopify, product pages with clear and detailed descriptions are 20% more likely to convert visitors into buyers.
Step 4: Set Up Product Variants (If Applicable)
If your product comes in different sizes, colors, or styles, Shopify allows you to set up variants. For example, if you’re selling T-shirts, you can offer them in small, medium, large, and different colors like red or blue.

Note: Shopify helps you add up to 100 variants for a single product!
Step 5: Organize Your Products
Organizing your products into collections or categories makes it easier for customers to find what they’re looking for. You can create collections like “New Arrivals,” “Best Sellers,” or “Discounted Items” to keep things simple.
Tip: Most Shopify stores see a 15-25% increase in sales when they organize their products well. Customers prefer to shop from stores that are easy to navigate.
Step 6: Search Engine Optimization (SEO)
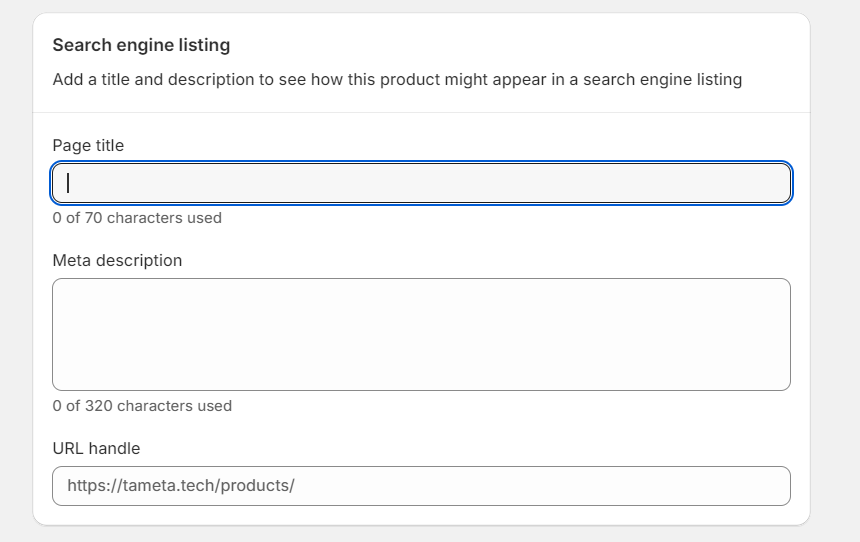
Now that your product information is set, it’s time to make sure people can find it online. Scroll to the Search engine listing preview section to edit your product’s SEO settings. Here’s what you need to do:

Remember: 93% of online experiences begin with a search engine. Optimizing your product pages for SEO can drive traffic and boost your sales.
Step 7: Preview and Publish
Before hitting the publish button, always preview your product page. This lets you see how your product will appear to customers on both desktop and mobile devices. Check for spelling mistakes, ensure all images load properly, and confirm that the price and stock are correct.
Once you’re happy with everything, click Publish to make the product live on your store!

Note: Shopify stores with regularly updated product listings tend to see 30% more traffic than those that don't. Keeping your store fresh with new products can attract repeat customers.
Step 8: Partnering with a Shopify Development Partner
Running a Shopify store may require additional customizations or technical support over time. This is where a Shopify Development Partner can help. They assist in building custom themes, and apps, or optimizing the performance of your store. As your business grows, collaborating with a development partner can help you scale your operations smoothly.
Tip: Hiring a Shopify Development Partner can save you 50% more time when compared to doing all the customizations yourself.
Also Read - How Shopify’s Discount Code Feature Can Increase Customer Loyalty
Step 9: Managing Your Inventory and Orders
Once you’ve published your products, Shopify will help you manage your inventory and track your sales. Shopify automatically deducts products from your stock when a sale is made, helping you stay organized.

Remember: E-commerce businesses lose out on 30% of potential sales due to poor inventory management. Stay on top of your stock to avoid this.
Step 10: Promoting Your Products
Now that your products are live, it’s time to promote them! Use social media, email marketing, and even Shopify’s built-in marketing tools to get the word out.
Tip: Stores that promote products on social media platforms like Instagram and Facebook see a 25% increase in traffic.
FAQS
1. How do I add products to my Shopify store?
- To add products, log in to your Shopify dashboard, click on the "Products" section, and then hit the "Add product" button. From there, you can fill in all the necessary details like title, description, and price.
2. Can I add more than one size or color for my products?
- Yes! Shopify allows you to add variants, which means you can offer different sizes, colors, or styles for the same product. For example, if you're selling shoes, you can add small, medium, or large sizes and different colors like red or blue.
3. Do I need high-quality images for my products?
- Yes! High-quality images help customers see your product. This is especially important because online shoppers can’t touch or feel the product, so pictures help them make buying decisions.
4. What is a Shopify Development Partner?
- A Shopify Development Partner is someone who helps you customize your Shopify store. If you need extra features or a unique design, a development partner can build it for you, making your store stand out.
5. Why is SEO important for my product listings?
- SEO (Search Engine Optimization) helps your products show up on Google and other search engines. This brings more people to your store and can boost your sales. Always make sure to add keywords, like “Shopify Product Addition,” to your product pages.
Conclusion
Adding products to your Shopify store doesn't have to be hard. By following these steps, you’ll make Shopify product addition easy and efficient. As your store grows, you might need the help of a Shopify Development Partner to handle more complex tasks, but you can confidently manage the basics yourself.
Ready to grow your Shopify store? Let Tameta Tech, your trusted Shopify Development Partner, help you! From custom themes to app development, we make it easy for you to scale your business. Contact us today and take the next step toward success with your e-commerce store!
Remember: Taking the time to properly set up your products can lead to a 30% boost in sales, so it's worth the effort!
With these simple tips, you can continue building your online business, one product at a time.


